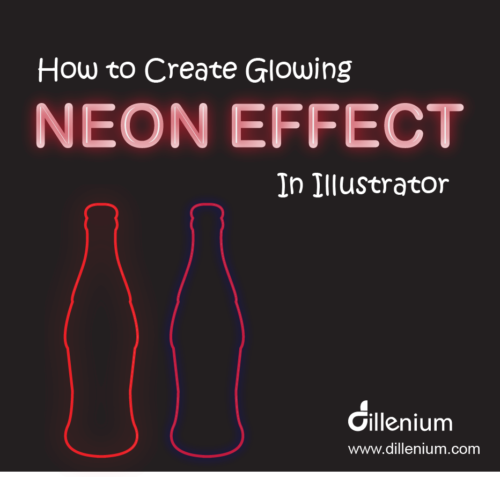
The simple and easy way of creating a glowing neon effect in Illustrator. I used Coke bottle outlines and created glowing effect using simple tricks of layering, blur, and feature. Neon Effect glow is the demanding most required method that most of the designers used in creative designs especially for digital glow or to highlight illuminated objects. My design technique to provide is simple and easy to adapt. Most recommended if you are learning illustrator and looking forward to knowing the tweaks to create these sort of glow or neon effect. Video Tutorial: How I Create Glowing Neon Effect In Illustrator CS6 Duration: 9:48 Download Project File: Click Here… Manual Points to Create Neon Effect Here are the steps that I used to create this glowing neon effect: Create New document Create black background layer and Press Ctrl 2 to lock the layer You can use the Pen tool to create bottle outline. Now increase the size of layer stroke to 5 pt and color to Red and don’t forget to remove the fill color. Now Copy the layer and Paste in the same place and turn the stroke size to 1 pt and change the color to white. Make sure to keep it in middle. Now choose 1st layer with 5 pt and make another copy and keep it same place. Now select front layer and go to Effect- Blur – Gaussian Blur and adjust the blur intensity. To increase the size of a blur, you can change the stroke weight. Now the Neon Effect is in front of you. You can copy the same layers and Paste on the side and change the color to purple. Watch the video tutorial to view all steps from start to end. Final Words: I always welcome your suggestions and views to improve my tutorials. You can also share your views regarding this post and especially your version of the glowing neon effect. It will be my pleasure to post your submission to my Pinterest to share traffic with your website. Also, let me know if you have any other requirement then you can share with me and I will prepare tutorial accordingly. Thanks for watching! Related Tutorial Might be Helpful for you: Create Chalkboard Vector Background in Illustrator How to Create Smoke Vector Effect in Illustrator How to Design Initials Logo Design in Adobe Illustrator 6+ Logo File Formats You Need to Ask from Your Logo Design Company How to Design Folded Letters Logo Design in Illustrator 20 Websites to Sell Art and Crafts Online
Now you can easily create chalkboard vector background in illustrator by watching all the steps in this Illustrator video tutorial. I used the simple and more realistic technique to design this chalkboard vector effect that easy to adapt if you are learning illustrator or beginner and looking forward to I used the simple and more realistic technique to design this chalkboard vector effect that easy to adapt if you are learning illustrator or beginner and looking forward to applying chalkboard background in your design creatives. Chalkboard textures are demanding and in trend due to vintage and classic look. You can use this chalkboard background to create printables, posters, billboards and other creatives. Watch Video Tutorial – Create Chalkboard Vector Background in Illustrator Watch time: 6:23 Download Project File: Click Here… Here you can manually follow the steps: Create New document, keep document size Create a black background layer with default black/grey gradient tool and keep the type radial. Lock layer by pressing Ctrl 2 from keyboard Now go to Effect – Texture – Grain Grain Type: Soft, Intensity – 45 and Contrast 75 (You can increase decrease as per your requirement of grains) Now select layer and go to Window – Transparency and adjust the blend mode to ‘Soft light’ Now Press F5 to intact Brush channel. Use default ‘Bristle Brush’ with the setting mentioned in the video Use the brush randomly in background layer and define chalk texture. You can make adjustments of color using color swatch. To make more realistic and blended look adjust the opacity. Now Vector chalkboard effect is there and you can use it in your creatives. You can also share your views regarding this post and especially your version of chalkboard vector background. It will be my pleasure to post your submission to my Pinterest to share traffic with your website. Also, let me know if you have any other requirement then you can share with me and I will prepare tutorial accordingly. Thanks for watching! Related Tutorial Might be Helpful for you: How to Create Smoke Vector Effect in Illustrator How to Design Initials Logo Design in Adobe Illustrator 6+ Logo File Formats You Need to Ask from Your Logo Design Company How to Design Folded Letters Logo Design in Illustrator 20 Websites to Sell Art and Crafts Online
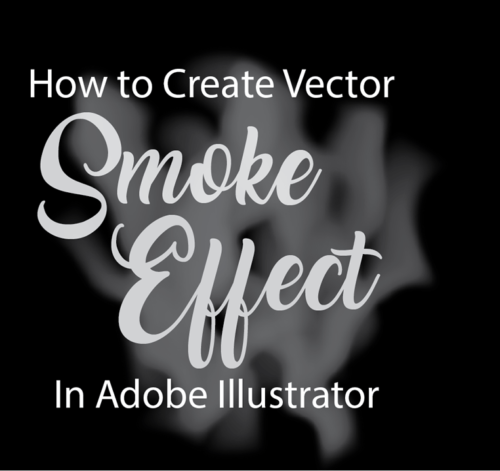
Here is the simplest method to create smoke vector effect in Adobe Illustrator. It’s a video tutorial so you can easily watch all the steps to create smoke in illustrator. Smoke graphics can be used in a variety of ways like to create a smoke concept in posters, billboards, digital wallpapers or in custom type graphics. I tried to design smoke in a simple and most convenient way so if you are learning illustrator or beginners and interested to know the techniques then this tutorial must be insightful for you. Watch Smoke Vector Effect in Illustrator – Video Tutorial Download Project File: Click Here… Here you can follow the steps manually: Step 1 Create ‘New’ document Use Document workspace 560×560 pixels in size Color mode – RGB Resolution: 300 PPI Step 2 Create black background layer using rectangle tool. Press Ctrl 2 to Lock the layer. Using Rectangle shape tool, create 4 consecutive rectangles like in the video Intact Direct select tool by press ‘A’ from the keyboard. Smooth layers of the 1st rectangle and create a copy and past at the end of 4 rectangles. Step 3 Now use Mesh tool or Press ‘M’ from keyboard to intact Mesh tool. Add layers of each rectangle and add gradient grey color. (watch video to review steps) Now select all rectangles and go to Window – Transparency Adjust Transparency blending mode to screen and Opacity to 80% Select all rectangles and press shift R to intact Warp tool. Now double click on Warp tool and change the width to 250 px and height to 100 px. Now deform the rectangles randomly using warp tool. Reduce the size and select all rectangles. Go to Window – Stylize – Feather and change the value to 32. Now go to Window again and use Blue – Gaussian Blur. Adjust blur value Assemble rectangle layers in a smoke format as shown in the video. Voila! your smoke vector effect is ready to use. You can let me know if you have any question related to smoke vector effect or if you have any other requirement then you can share with me and I will prepare tutorial accordingly. Thanks for watching! Related Tutorial Might be Helpful for you: How to Design Initials Logo Design in Adobe Illustrator 6+ Logo File Formats You Need to Ask from Your Logo Design Company How to Design Folded Letters Logo Design in Illustrator 20 Websites to Sell Art and Crafts Online V Watch Illustrator Video Tutorial to Make This Effect
In this Illustrator tutorial, I created circle logo design with cut marks in multi-color layers. It’s an Illustrator tutorial for beginners who want to learn the basic techniques to design circle logo design with some tweaks. I tried to describe each step in the easy and most comprehensive way. Super easy for beginners want to learn illustrator logo design techniques. Circle logo design can be designed in several ways based on the design concept. This sort of circle logo can be used in a business logo as a frame or can be used as an app icon. For convenience, I created a video logo tutorial as it’s easy for beginners to understand basic technique in little time. By watching Youtube video, you can learn all the steps from start to end to design this circle logo design. Here are the steps that you can also follow: Using shape tool, create an ellipse by holding shift key from the keyboard. Now go to Object and choose path – Offset path and define value to 10 px. So you have 2 circles in front of you. Now take Rectangle tool and create intersecting lines at the center of the circle in a horizontal and vertical way. Keep the thickness of lines according to cut marks. For this, you can adjust the height of lines to keep it thick or thin. Draw the same lines diagonally. (watch video to see the line process) Now use rubber band select and select each layer. Go to Window – Pathfinder Choose divide option Now deselect and remove the unwanted areas and lines. Clean the circle and change the color from color swatch. To understand all steps, I recommend you to watch video as it’s super easy to understand the whole process. Here, you can watch circle logo design video: Watch Circle Logo Design in Adobe Illustrator Watch time: 4:50 Download Project File: logo design – Illustrator File Basic idea to design this logo is to share techniques and use the most common functions of Adobe Illustrator. By designing this logo, you will be able to use the proper function of Pathfinder and shape tool. You can let me know if you have any other requirement or query to design logos. Related articles might be helpful: Illustrator tutorials – Design in Adobe Illustrator New Apple iPhone vector mock up – iPhone X Design letter logo design in Adobe Illustrator
Here you can find the most required real estate marketing signs for realtors and brokers for real estate company. When we talk about real estate marketing then the marketing signs are important for every real estate company and realtors to market their business in a proper way. Today, we are going to talk about most recommended real estate marketing signs and other elements that every realtor need to have for proper marketing and management. As I am working on several real estate marketing ideas to market business online and offline so I wrote this post to facilitate realtors to find required stuff as per their requirement from a single place. Have a look in Real Estate Marketing Signs to Market Your Business Real estate is the big and most demanding market that need proper marketing stuff to get potential leads. So let’s start to delve into it: 1) Real Estate Yard Signs / Rider signs Real estate yard signs, rider signs, and related signs basically come in different sizes as per the requirement of real estate agent. Yard signs market your business to targeted people. Here are few real estate yard signs that you can easily take: These signs are based on print-ready design. You will get design file through email. Shipping is not included. 15 Real Estate Signs 6×24″ (Send custom request here or on Etsy shop if you need sign design with business branding) Custom Real Estate Yard Sign Design Custom Realtor Open House Yard Sign 2) Real Estate Open House Sign Every realtor wants to go for successful open house day to get targeted lead in short time. So to go for a perfect open house event, you need proper open house welcome sign that you can use for marketing purposes. Here are few open house welcome signs that you can instantly download and print to market your day. Welcome to my open house Real estate open house welcome sign Open house printable Realtor open house flyer 3) Real Estate Feedback Form Every realtor knows the importance of open House feedback form, evaluation form and real estate sign-in sheet to record people feedback and opinion. Here you can find real estate feedback form as per your need. These forms are available as digital download and you can instantly download. Feedback form for realtors with custom branding Real estate feedback form Instant download (available in 3 colors) Realtor sign-in sheet (instant download) Real Estat Open House Printable (All in One Package) 4) Realtor Daily Goal Planner Every realtor wants to be focused and organized to do the daily task. Goal planner printable help you to keep focused on your daily jobs and assess performance at the end of each month and make new targets and milestone of the upcoming month. Download Realtor Goal Planner – Instant download 5) Real Estate Logo Real estate logo design is important for every real estate company and independent real estate agents to build their presence with innovative logo concept. Here you can find logo design listings as per your requirements. Premade real estate logo design Custom Real estate logo design 6) Realtor Website Real estate website design is important to grow your business using the digital channels. Full responsive, high definition, SEO friendly, easily customizable and editable website is the most require website for real estate agents and companies to have. Here is the real estate website listing that helps you to go for custom real estate website by choosing website theme. Choose Real estate website theme (link coming soon) Custom real estate WordPress website design 7) Real Estate Postcard Real estate postcard marketing is most recommended and works as well. 80% of real estate agents want to promote business with engaging real estate postcard and door hanger. Fit small business wrote a blog post about real estate postcard that worth to read. Here you can find the listings to get real estate postcard along with custom real estate postcard design. Real estate postcard templates Custom real estate postcard design with personal branding 8) Real Estate Flyer Just like a real estate postcard, flyer also has their own importance. Internet is full of Real estate flyer templates that you can take as per your requirement and business details. If you are looking to get custom real estate flyer design then you can click here to get the service. Real estate flyer templates Custom real estate flyer design 9) Real Estate Business Card Real estate business cards build your business identity in a professional manner. Modern and classic style business cards both are in trend but minimalistic real estate business card design is in demand. Real estate business card templates Custom real estate business card 10) Custom Graphics Design Real estate is the big market and branding is the most important element to get customer attention. If you want to get custom branding of your marketing signs or need above templates with custom branding then do let us know here or on Etsy shop through conversation to design project for you. Custom Graphics Design You can also let us know about your suggestion to add more templates as per your need. I am interested to design custom real estate forms so let me know which form is the most required and I will design the form on the basis of customer demand. Thanks for reading!!
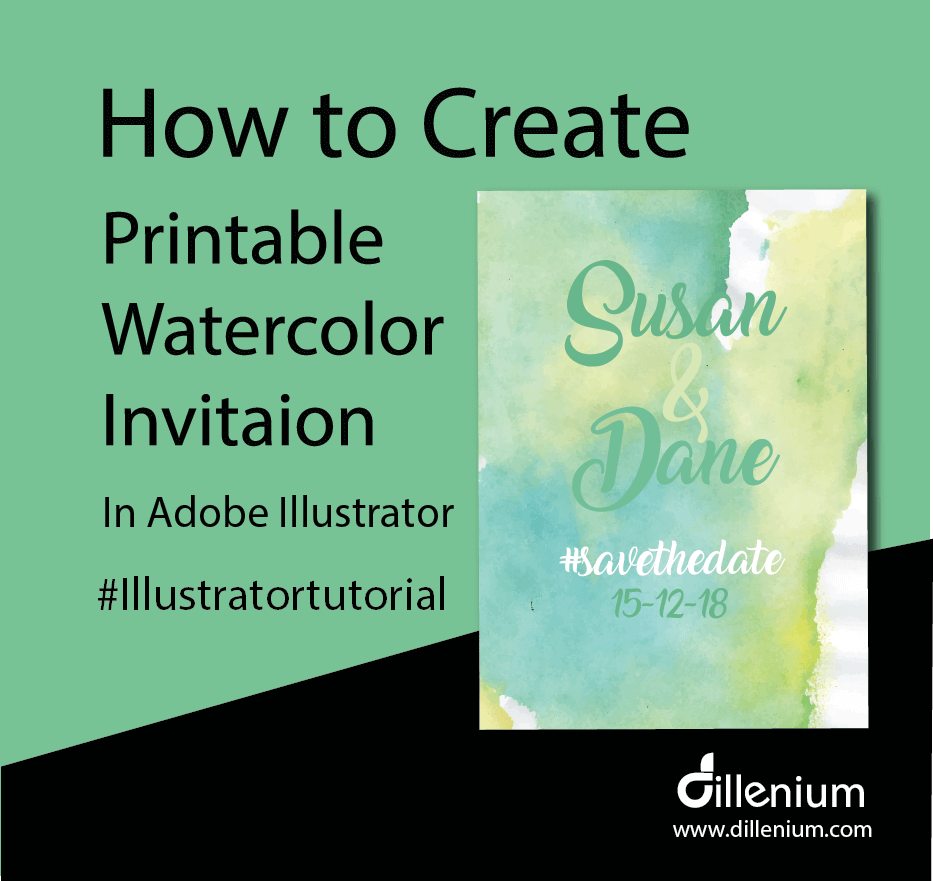
Follow step by step to make watercolor printable wedding invitations in Adobe Illustrator. Video tutorial is linked to see all the steps from start. This tutorial will facilitate you to learn basic steps from start to end to design wedding invitations. You can use your creativity to add more embellishments as per your invitation requirements. Here, I created ‘save the date’ invitation. In this Adobe Illustrator tutorial, I designed professional watercolor printable wedding invitation template that you can easily use to print in the same way. We all need professional printable invitations on different occasions of life so it’s better to design it yourself just by following the few steps and save your design cost. My objective to do this illustrator video tutorial to guide about the basic steps from start to end to design this elegant Save the date invitation that you can use in a variety of ways. You can easily change the content and design with your creatives. Follow Steps by Step to Make Watercolor Printable Invitation Adobe Illustrator is the great tool to design professional graphics especially the vector ones. I love to design graphics using Illustrator. It’s simple, easy, editable and user-friendly so follow the steps with me and design your graphics in your own way. You can also download the invitation file. (link available at the end of this article). So let’s get started! Step 1: Define your printable invitation Artboard settings Create New document and use the width 5×7″ (standard size of invitation card) Keep the orientation to Portrait Use CMYK (recommended for print) and resolution to 300 PPI Bleed is 0.125″ (standard bleed size). Check your printer bleed requirement to go with this. Step 2: Set your Artboard Press control R to intact rulers Now define guides on top, left, bottom and right to work in proper order. You can watch the process in the video to get the complete idea to place guides within artboard. Step 3: Start Designing Go to File – Place Image file of watercolor background (You can find the image in download link). If you are using your image or watercolor background then make sure it needs to be high resolution and color mode should be CMYK. Resize the background image according to the size of your artboard. Make sure everything aligned properly with bleed lines. Strat writing invitation text using Type tool. To invoke the layer type T from the keyboard on PC. Now choose the font from font list. I used Amarillo that you can download from the download link below. Or follow the post where I wrote about best wedding fonts. Write complete text with proper formatting Conver text to outline. Step 4) Save Print Ready PDF File Go to file and choose Save as PDF option Now choose High-Quality print in Adobe PDF preset In Marks and Bleed setting, mark checks on Trim and Use document bleed option Click Save Now you are done! You have created a professional printable watercolor invitation template. You can take it to print to professional printing service. Here is the video tutorial that you can watch to design professional and print-ready invitations just in few minutes. How to Create Printable Watercolor Invitations in Illustrator Download Project File: Click here! Articles might be helpful for you: How to Design Folded Letters Logo Design in Illustrator Design Wedding Invitation in Adobe Illustrator Download Free Best Wedding Fonts for Wedding Invitation Wedding Planning WordPress Theme to Mark Your Day Download Free Elegant Wedding Fonts 10+ Inspirational Wedding Website Ideas How to Design Initials Logo Design in Adobe Illustrator 6+ Logo File Formats You Need to Ask from Your Logo Design Company
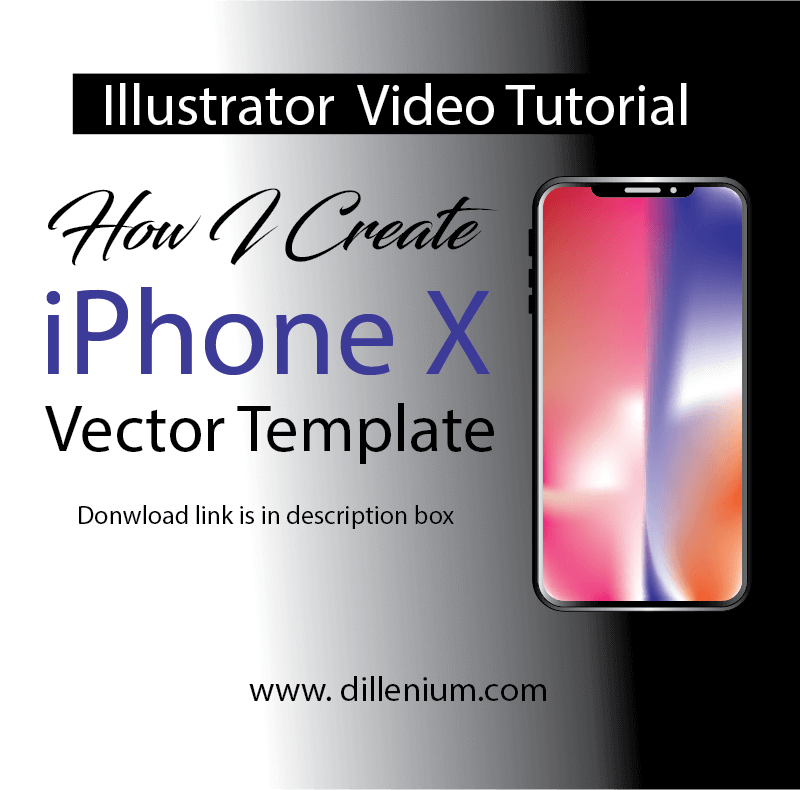
Easily design new iPhone X vector template in illustrator. Watch iPhone mockup video to learn the steps and download iPhone X mockup vector file template. I recently created new iPhone X vector template mockup that you can easily use in web and print products. The latest version of Apple iPhone X released and we are all so excited to use it as soon as possible. The design concept of iPhone is creative and engaging and everybody loved it when it revealed in iPhone launch event and gone viral on social media right after the event. I loved the design of new iPhone X and tried to design the layout in Adobe Illustrator in vector format. You can watch my iPhone X mockup video to view all steps and download file using download link at the end of this article. iPhone X vector mockup template is absolutely customizable and editable in Adobe Illustrator and you can make changes as per your need. How I design iPhone X Vector Mockup | Template I used the graphics software Adobe Illustrator to design iPhone X vector – template. Below are the 4 steps that you can follow if you are looking to design in the same way. Below are the 4 steps that you can follow if you are looking to design in the same way. Here are the technical specifications of iPhone X that I followed in my design process. Step 1 Add new document with the width 2.79″ and height is 5.65″ Color mode: CMYK Raster effect: High 300 PPI Step 2 Add Round Rectangle from Shape tool and make corner radius to 25 px. Draw round rectangle by covering artboard of 2.79×5.65″. Select rectangle and go to Object – Path – Offset Path and define offset value to 5 px Select the same rectangle again and repeat steps and this time define offset value to -5px Now you have 3 consecutive rectangles in front of you. Add color shade to Ist two rectangles by using swatch and gradient panel. (Explore panels through Window from top menu) Step 3 Remove stroke and color fill in 3rd rectangle. Press control U to intact Mesh tool. Make anchor points in 3rd rectangle and add colors. (watch video to view all steps) Step 4 Add round rectangle with 12px corner radius and width 1.43″ and0.30″ height Add another rectangle with hard corners and place over the round rectangle Select both shapes and press Subtract from Pathfinder. (Explore panels through Window from top menu) Now place the shape at the top of the 3rd rectangle and make sure to keep it in the center. Add microphone and speaker icon by placing small size round rectangle and circle with whitish gray color Now add small round rectangle at the left side of iphone to show silent/ring button and volume up and down. And you are done now! Illustrator Video Tutorial – Design iPhone Vector Template Download Files – New iPhone Vector Mockup | iPhone X Articles might be helpful for you: How to Design Folded Letters Logo Design in Illustrator How to Design Initials Logo Design in Adobe Illustrator 6+ Logo File Formats You Need to Ask from Your Logo Design Company
Adobe Illustrator is the great tool to design vector graphics in creative ways. I love to work on Adobe Illustrator for all my graphics work. In this tutorial, I want to share the basic techniques to design folder letters logo design to my readers. For this, I recently uploaded a video on Youtube to share best and easy technique to design folded letter N. Letters can be designed in a variety of ways but my objective to share folded letters technique in a more simplified way. Basically, folded letters are all about creating folded illusion using shapes and integrating anchor points.So let’s start the logo design process and have a look in video tutorial to have a quick look at all steps. Steps to follow for folded letters logo design Here are the points that you need to focus when designing folded letters look. Create a vertical rectangle using ‘shape tool’ or press M. Press A to intact direct selection tool. Click on bottom left anchor point and drag it to left to create a slider look. In the same way, click on top right anchor point and drag horizontally to right to create proper slider look. Now you have slider rectangle. Next, press control C and Control F to copy the rectangle on same place. Move the copied rectangle to the right side. Using the same technique and create another copy of rectangle and place on the right side. Now you have 3 consecutive slider rectangle. Click the middle rectangle and transform to reflect horizontally. Now align the middle rectangle to the top left of the 1st rectangle. To make perfect look on letter N, aligned and drag to the right side for proper angling. Now connect the 3rd rectangle to middle rectangle by aligning from bottom anchor points. Bring the middle rectangle to front. By going transform and arrange to bring front. Now add colors to create the folded look. Add the same color to 1 and 3 rectangle Add a different color to middle rectangle. Now you are done! You have folded letter N logo design in front of you. Here is the video to watch all the steps: Watch time: 3 minutes 17 seconds Download: Project File – Letters logo design This tutorial is recommended for beginners who want to learn basic technique to design. If you have some better idea to design folded illusion then you can share with me. I will add your post on my website and also pin it promote your work. You can also watch my youtube channel to get more ideas and basic techniques to design concepts. Related Post and Videos: How to design pattern shapes in Adobe Illustrator Learn to design circular twist shape logo icon in Illustrator How to design circle logo design in Adobe Illustrator 6+ Logo Files Formats That Need to Ask from Logo Design Company Explore premade logo designs Explore Video Illustrator Tutorials
Designing a logo is the most creative job that logo designer does by placing the required business concept on the place. Business initials in logo design are so common that most of the business owner wants to have. Initials logo design basically provide interactivity in design by placing first letters of the business name. It could be an abbreviation or might be the first two letters of the business name. Today, I am going to share some initials logo design techniques and ways that you can use to design your business logo. If you are a beginner and learning “how to design logos” then this post is for you as you can learn the basic concepts of initials logo design and keep the designing unique. Points to Consider when Designing Initials Logo Design When you design initials logo concept then make sure to consider below points: Letters should be readable even if you are applying the concept. Letter layers should be designed with proper layout and should not intermingle the concept. Make sure to design with proper mathematics. Use guide and rules for this. Letters layers should be proportionally designed in a proper order. As a best practice, make a raw design before converting into the vector. Layers combination should be clean and concise. Take care of broken layers. Convert the design into outline before creating the final file. Here is the link of some good and conceptual initials Logo Design on Pinterest Example to Watch “Initials Logo Design” I recently designed the initials logo for a business group starting with the letter J and P. Basically the business concept based on the simple and minimalist theme so I tried to connect J&P by adding some variation in design. In below video, I captured one of the concept of logo design process to share with my audience. Here are the steps that you can note down to design the similar concept: Using Text layer, write letters. I wrote JP using Lucida Console font Convert letters into outline Reduce the gap between letters using backspace or through the mouse. Now change the color of both letters Draw a simple stripe using the Pen tool. (You can see the stripe design in video) Rotate the stripe with 30-45 degree angle. Place the stripe in the middle of J and P Select all layers together. Go to Pathfinder and click the Divide option. ( You can find Pathfinder under Window in top menu). Now select the downside of J and P and move down with the ‘down’ arrow key. In the same way, add some lift at the upper part of JP by selecting the layers. (Watch video for better view) Now Join the middle part of the stripe by selecting the layer using Pathfinder And now you are almost done with the design of initials. Move to add business name and tagline. Here is the video to watch all the steps: Watch time: 3 minutes 30 seconds Download: Project File – Initial logo design You can design your logo in a variety of ways as per the business concept. It’s all about adding creativity in design to show the business concepts in a unique way. You can also share with me if you would like to share your logo concepts and anything that can informational for me and my audience. Related Post and Videos: How to design pattern shapes in Adobe Illustrator Learn to design circular twist shape logo icon in Illustrator How to design circle logo design in Adobe Illustrator 6+ Logo Files Formats That Need to Ask from Logo Design Company Explore premade logo designs
Here is the step by step mini guide to start a blog for Etsy shop to grow business. Yes! I did this and grew up my Etsy sales with unique customers within few days. You can do the same if start with right strategy. You can also do the same if start with right strategy. Yes! Blogging is the right formula… Blogging is the great platform to market your business to your target audience. I started blogging by chance as I was writing in local magazines so I decided to put my writings on blog so my journey started out and it leads to several businesses. I learned a lot during this period and now wanted to share my knowledge to beginners. Today, I am sharing step by step guide for new Etsy sellers or Etsy shop owner to grow their business presence using blog. Most people think it’s a time-consuming job and too techy to manage but believe me, it will create a big difference in your sales and to improve your business revenue. Through blogging, you can bring global customers to your shop. My idea is to keep this post short and to the point, so the beginners can easily get the idea to start their blog right a way just by following the steps. Budget is also important so I will share the best options to start a blog with economical range. Many Etsy Store using Blog to promote their business like Everything Etsy and TwelveSkip, So let’s get started! Follow Step to Start a Blog for Etsy Shop Step 1 – Get Domain name Domain name is the name of your blog or the address of blog/website that people use to reach your blog site. It’s easy to say, it’s an address of your blog that people type in address bar called URL (Universal Resource Locator). Like; www.blogname.com You can decide domain name as per your business information or might be you can take your Etsy shop name to create a domain name if it’s available. If your Etsy shop name is not available as domain name then don’t worry about it. You can take another good name as it will not make any difference in your traffic. But make sure the domain name should be: not too long easy to call easy to write short and not too confusing for others to understand the concept of your shop. Best idea is to write 10 – 15 names and then shortlist the best names and check their domain availability. 6 Ways to Find Good Domain Name for Your Blog or Website How to Check Domain Availability To check domain availability, go to www.namecheap.com In the search bar, write the selected name by choosing domain extension (TLD). If it’s available then note it down. Don’t buy the domain yet as I will tell you to buy a FREE domain when purchasing hosting service in Step 2. Make sure to choose TLD as per your requirement. Domain with .com has high value otherwise you can take .net and other regional TLD. Like; www.domainname.com.au with .ca, .se, .in or other as per your requirement or interest. Now time to move on selecting hosting service. Step 2 – Get Hosting Service Getting best hosting service in an economical range is important. There are so many hosting services in the market providing cheap packages but it’s not advisable to go with them as it will suck you in long run. A good host will have following features: 100% uptime Unlimited Storage Backup services Unmetered bandwidth Secure and reliable network Domain based email addresses 24 hours live support Good idea for beginners to start with shared hosting services and later when you get the traffic you can move to dedicated or VPS hosting service. I recommend my clients to go with Bluehost or Justhost to get their hosting as it’s economical and shows 100% uptime. I also used Bluehost by myself for several websites. So if you choose Bluehost as your hosting provider then follow the steps to register hosting with free domain. Go to Bluehost website hosting page Click on “Get Started Now” Check the Basic plan (recommended for new blogger) but I recommend you to go for Pro Prime Package as it includes SSL. (According to new update of Google, SSL is recommended for websites/blog to get rank on search engine) Get it as it will make your post secured and easily get traffic. Select package here and move to purchase the hosting It will take you to “Sign up Now” page Write your domain name here. There are two options: One for new domain If you already have a domain name then write it here Click Next Complete further detail of Account, Package, and Payment information Mark check on Agree terms and condition Click Submit button Now check your email to get CPanel login information. Login to Cpanel with received information in an email. Now you are done and next move is to install WordPress Step 3 – Install WordPress As I told you earlier that Bluehost is good hosting service and facilitate user to install WordPress with 1-click install. In CPanel dashboard, find WordPress and click on it to start the installation. Now follow the step to complete the installation process: Write the domain name here that you entered in domain name section. For instance; www.websitename.com Keep the directory field blank (By keeping it blank, it will install WordPress in root folder otherwise it will install in sub-directory) Click Next So WordPress installed now. Voila! This information is only valid for those users who already registered the domain name from another domain registrar. If you take the domain and hosting from same company then you can move to Step 4 – Apply theme This is called Domain Pointing Login to your domain registrar account Access dashboard Locate the My Domain option Click on Manage domain Edit DNS Enter the hosting company DNS in your DNS Section like; NS1.bluehosting.com If you feel so technical then you can take […]
Here are 5 simple and effective techniques to improve your Etsy Shop Traffic to increase Etsy sales exponentially. I used this to increase my Etsy sales. A few years back, I was looking and searching the way to increase Etsy traffic just to increase my Etsy sales and after research and spending more time to learn the Etsy search behaviour now I am able to write this post to share my insight to new Etsy sellers and people who want to increase their shop sales. If you are my reader and interested to sell on Etsy then you can follow posts at the end of this article. Etsy is the great marketplace to sell your product to global customers. After the last updates in January 2017, Etsy sellers experiencing tough time to increase their sales and also wants to improve traffic and views. According to me as I feel Etsy new updates are more professional and new features are the requirement of real time. But if you are on the same ship and getting down in sales then this post is for you. Increasing Etsy shop sale is all about reading and understanding Etsy search behavior. So here you can review 5 simple techniques to improve Etsy shop traffic to increase sales. When I first started my Etsy shop, I spent my big time to understand how Etsy shop work and how the targeted customers can find my product. Basically, Etsy search mainly focuses to rank products on the basis of Title and Tags. Initially, my sale was showing roller-coaster ride as I was not set with targeted keywords to bring right traffic on my site at right time. Today, my sales grew up 80% just by focusing few things and I want to share my best practice with you that you can also incorporate in your shop to grow sale. Complete Guide To Start Your Etsy Sales Growing Shop 1) Add Quality Listing Yes, it’s important to add a quality listing fully equipped with all the required ingredients. First, think like a customer and make your own critic. Like; if you are searching the product with specific category then which type of product you want to click. Of course the one with good quality fulfilling required demand. A listing design is so important to consider. As it needs to be engaging to get customer attention in the first click. Boring, non-professional design can come up in Etsy search but people will not click it. So be Think Like a Customer First, think like a customer and make your own critic. Like; if you are searching a product with specific category then which type of product you want to click. Of course the one with good quality fulfilling required demand. A listing design is so important to consider. As it needs to be engaging to get customer attention in the first click. Boring, non-professional design can come up in Etsy search but people will not click it. So keep focus to design highly presentable and clickable design of your product. Take Help with Professional Graphic Designer For this, you can take help with professional graphic designers who can help you out to design your shop graphics and product listing design at minimal cost. Take a listing template from designer and add your all listing items by using that template to manage a similar tone of your shop. There are so many good designers on Etsy that might can help you. 2) Learn Etsy SEO to Grow Etsy Shop Traffic Now next step to focus on Etsy SEO techniques to grow Etsy shop traffic. For this, you need to learn and investigate Etsy search behavior to get your product listed with high rank. For this, you need to focus on your target market or your targeted customers and you will target those customers with targeted keywords. Here you have 3 choices to get the customers from: Google search Etsy search Social media My best option is to write keywords that accommodate all three search. So I made a strategy to find related keywords from Etsy search and from Google Keyword planner. Understanding Etsy searching is easy, simply go to Etsy website and write about a product that you want in Etsy search bar. Etsy will show you a list of related products. 1st row will comprise on the non-organic product (meant to say advertisements) and next to that you will find the related product. Now you can check title, tags and description of best-ranking products. A few days back, I wrote a complete article on Etsy shop SEO that you can explore to get more insight. “19 Ways to improve Etsy SEO of Your Etsy Shop“ I hope the above article will help you to boost your Etsy traffic just by doing little SEO tweaks. You can also take help with professional Etsy SEO Specialist if you are uncertain in some of the areas. Take ETSY SEO Help with Professionals 3) Look Around Best Selling Similar Product Shops This is also one of the best options to look around best selling shop of your similar product. Delve into that like how they improved their sales to get inspiration. What are the techniques are they using to boost the customers. Etsy has a great feature to show the number of sales in each shop. Take benefit of this feature and check out the sales. Don’t get desperate if they have a high number of sales and you are not in that cycle just take inspiration to boost your sales strategy. You may have a look in following: Like; when the shop opens up, the number of product listings and number of sales figure. This is enough for you to get idea about shop success. Now time to apply your research data in your shop. But how? Simply by Improving title keywords and related tags. 4) Pin Your Product Most of the Etsy seller ignore this option to share your post on Pinterst. As per my personal experience Pinterst is the most […]
It’s a wish of every designer to expand their business with more clients and customers. So if you are a creative designer, website developer or have skills to create beautiful arts and crafts then this post is for you. Today, we compiled a researched list of best places or websites where you can place your crafts to sell online. Best Websites for Creatives to Place Arts and Crafts to Sell Online 1) Etsy Etsy is the great market place to find every type of creative stuff from world best creative people. The website is user-friendly and easy to access for every designer. If you are new to Etsy then just go through the website, create your account, start your shop by placing your crafts and start selling online. Etsy provides a simple way to place your crafts to sell online. Use it and grow your customers! Here is the complete guide to start your Etsy Shop 2) Creative Market Creativemarket is full of innovative designs and concepts to grow your business. Here, you can easily buy and sell handcrafted, mouse-made design content like vector patterns, icons, photoshop brushes, fonts and many more within the creative category. Creative Market has over one million users and more than 250,000 purchasable items. It was founded in 2012 by Aaron Epstein, Chris Williams, and Darius A. Monsef IV in San Francisco, California. You can easily create your account here and after approval, you can place your crafts to sell online. Voila! 3) Envato Envato is another big place to sell creatives. The marketplace based on themeforest, graphicriver, codecanyon, audiojungle, photodune and 3docean. It comprises on over 9 million digital products created by a global community of designers, developers, photographers, illustrators & producers. The selection process is little tough on Envato market to maintain the quality product but you can easily create your account and apply for approval to get listed with your crafts to sell online. 4) ShutterStock Shutterstock is a global marketplace for artists and creators to sell royalty-free images, footage, vectors, and illustrations. You can simple create account and place your arts and digital crafts to sell online. You can also review their terms and condition here before creating seller account. 5) 99designs 99 designs is another big and quality market place for online designer especially for creatives in logo, web design and graphics category. You can register your account here to sell your product through contest and as graphic designer. People are able to hire stand alone designer here or also you can submit your entries in on going contest. Basically it ranked creatives on the basis of their content and winning entries. 6) DesignCrowd and Brand Crowd DesignCrowd is another graphics design website similar to design99. You can register your account here for selling product requested by client in contest. They offer crowd sourced logo, freelance graphic and web design. Almost thousands of freelance designers compete here to create amazing designs for business. Design crowd has another famous website by the name of brandcrowd where you can register your logo design for selling. 7) Brand Bucket Brandbucket is the famous website to sell brandnames. If you have skills to create big brand then you can register theme to sell on brandbucket. Currently brandbucket is the best place for brand name lovers. If you are going to start your business and looking for creative and innovative brand name then you can buy premium names from here. Mostly the names are brandable. You can also sell your brand names here and also have an opportunity to design logos for listed brand as designer. 8) Namerific Namerific is also similar to brandbucket providing opporutnity to domain and brand name seller to sell their business name by listing at namerific website. 9) Threadless Threadless is the best place for global creatives and artist to sell online. By using the website you submit your designs to a public vote. If you get enough votes from the community you’ll get the chance to make money through the site’s online production and promotion of your products. You can sell t-shirts, art prints, iphone cases, home decor, and more featuring unique designs based on your skills and expertise. 10) Minted Minted is the place to sell invitations. If you love to design creative invitations like wedding invitation, baby shower and related category then surely create your account at Minted. Minted uncover design genius through ongoing design competitions. At Minted, all that matters is good design. Designers submit, and the Minted community votes to tell us what to sell. 11) Zazzle Zazzle is famous for it’s innovation as it allows designers and customers to create their own products with independent manufacturers, as well as use images from participating companies. From cool t-shirts to custom mugs to DIY invitations, Zazzle is the place to unleash your creative side. You can sell your amazing product today at Zazzle marketplace. 12) Zooppa Zooppa is like home for creatives. It’s a leading creative platform for the production of engaging video and graphic content for famous brands all over the world. You can join Zooppa creative community to work with the most elite brands in the world. 13) Society6 Society6 is another online place recommended for creatives to sell design work, focusing on “affordable art prints, iPhone cases and T-shirts”. It’s free to set up, and the products are produced made, shipped, and managed for you – leaving you with only the designing to do. With the site only taking a small percentage of what you sell back, this is a great place for designers and creatives looking to get their work featured onto a vast range of products. 14) Myfonts Myfonts is the place for font designers. If you have skills to design innovative fonts then myfonts is the recommended place for you to place your font to sell online. Here is the guide to submit font on myfonts. Start selling and expand the list of your satisfied customers. 15) VideoHive Videohive is the great place to market your skills with creative video templates. It’s a platform provided by Envato […]